 Skip to content
Baking sourdough is a rewarding two-part process: first, you create and maintain a “starter” (the natural yeast), and then you use it to bake a loaf. I’ve gathered information from several sources to guide you through both stages.
Here is a comprehensive guide to creating a sourdough starter and baking a classic loaf of bread.
Part 1: Creating Your Sourdough Starter
A sourdough starter is a living culture of natural yeast and bacteria that you “feed” with flour and water. It’s what makes your bread rise and gives it its characteristic tangy flavor . You don’t need anything fancy to begin—just flour, water, and a little patience.
Here is a simple, reliable method to create your starter from scratch. This process typically takes about 5 to 7 days .
Day Instructions
Day 1 In a clean plastic or glass container, mix 50g wholemeal flour, 50g white bread flour, and 100g warm water until well combined. Cover loosely with a lid or a kitchen towel and leave it in a warm spot in your kitchen (around 21-27°C) .
Day 2 You might see a few small bubbles. Remove about half of the mixture and discard it. To the remaining starter, add another 50g wholemeal flour, 50g white flour, and 100g warm water. Mix well, cover, and return it to its spot .
Day 3 to 7 Repeat the process from Day 2 each day. Discard half and feed it with the same amounts of flour and water. Within a few days, you should notice it becoming very bubbly, growing in volume, and developing a pleasantly acidic, sour smell. Once it is consistently bubbly and doubles in size within a few hours of feeding, it’s ready to use .
A few important tips for your starter:
Don’t use metal bowls or spoons, as some believe it can react with the culture. Glass, ceramic, or plastic are best .
If you won’t be baking for a while, you can store your starter in the refrigerator. Feed it, let it sit at room temperature for an hour or two to get active, then put it in the fridge. It can last there for up to 2 weeks. When you want to bake again, take it out and give it a feed the day before .
If you want to try a different method, starters can also be made with just white flour, or with interesting additions like green grapes to kick-start fermentation .
Part 2: Baking Your First Sourdough Loaf
Once your starter is active and bubbly, you’re ready to bake! This recipe is for a classic, bakery-style sourdough with a crisp crust and chewy interior .
Ingredients:
500g bread flour (high protein content is best for structure)
100g whole wheat flour (adds flavor and nutrients)
375g water (filtered, at room temperature)
100g active sourdough starter (make sure it’s been fed recently and is bubbly)
10g salt (about 2 teaspoons)
Instructions:
Mix & Autolyse (Rest): In a large bowl, combine the bread flour, whole wheat flour, and water. Mix until no dry bits remain. Cover the bowl and let it rest for 1 hour. This step, called autolyse, allows the flour to fully hydrate and starts developing gluten naturally .
Incorporate Starter & Salt: Add the active sourdough starter and salt to the dough. Mix by hand, pinching and folding the dough until everything is fully incorporated .
Bulk Fermentation (First Rise): Cover the bowl and let it rise at room temperature. This will take about 4-6 hours, depending on the temperature of your kitchen. During the first 2-3 hours, you’ll perform a series of “stretch and folds” every 30 minutes. To do this, wet your hand, grab one edge of the dough, stretch it up, and fold it over the top. Rotate the bowl and repeat 3-4 times. This strengthens the dough without kneading .
Shape: After the bulk fermentation, turn the dough out onto a lightly floured surface. Gently shape it into a round or oval loaf. Let it rest for 15-20 minutes, then do a final shaping to create tension on the outer surface .
Proof (Second Rise): Place the shaped dough seam-side up in a floured proofing basket (or a bowl lined with a floured kitchen towel). For the best flavor, cover it and let it proof in the refrigerator overnight (8-12 hours). This is called cold retardation .
Preheat & Bake: Place a Dutch oven (or a heavy oven-safe pot with a lid) in your oven and preheat it to 245°C (475°F) . Once hot, carefully remove the pot. Turn your proofed dough out onto a piece of parchment paper, score the top with a sharp knife or razor blade (this controls where the bread expands), and lower it into the pot.
Bake: Cover with the lid and bake for 20 minutes. Then, remove the lid, reduce the oven temperature to 210°C (425°F) , and bake for another 25-30 minutes, until the crust is deeply golden brown .
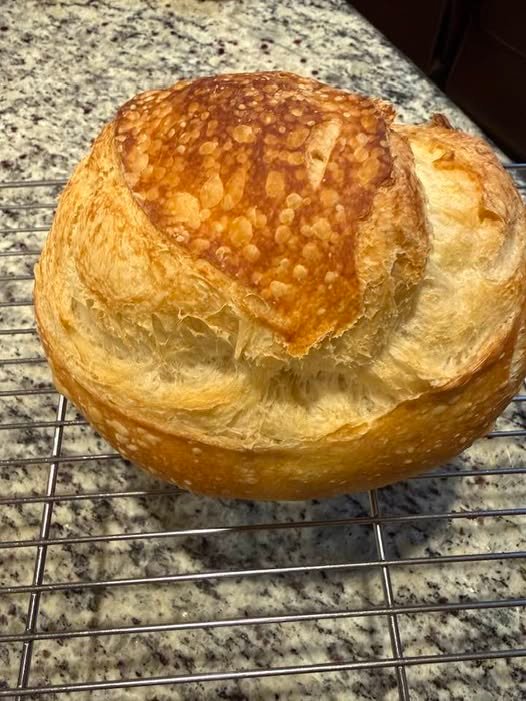
Cool: This is the hardest part! Transfer the bread to a wire rack and let it cool completely before slicing. This allows the crumb structure to set .
To test if your bread is done, tap the bottom of the loaf. If it sounds hollow, it’s baked through .
I hope this guide helps you successfully bake your own sourdough! It’s a journey, and each loaf will teach you something new. If you run into any issues, feel free to ask. Happy baking!