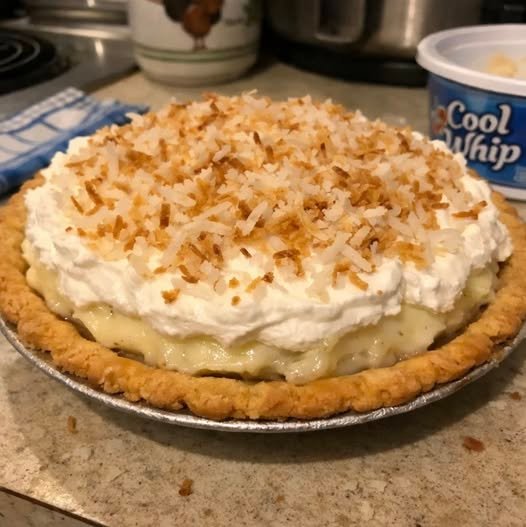
A real Homemade Coconut Cream Pie is all about the contrast: a buttery, flaky crust, a rich custard that actually tastes like coconut (not just sugar), and a mountain of whipped cream topped with toasted flakes.
If you want that “diner-style” height and stability, the secret is in the tempering of the eggs and using full-fat coconut milk.
1. The Components
-
The Crust: A 9-inch blind-baked pie shell (use your favorite flaky pastry or a toasted Macadamia nut/Graham cracker crust).
-
The Filling:
-
2 cups Whole milk
-
1 cup Canned full-fat coconut milk (shake the can first!)
-
¾ cup Granulated sugar
-
¼ cup Cornstarch
-
4 Large egg yolks
-
2 tbsp Unsalted butter
-
1 ½ cups Sweetened shredded coconut
-
1 tsp Vanilla extract + ½ tsp Coconut extract
-
-
The Topping: 1 ½ cups heavy whipping cream, 3 tbsp powdered sugar, and toasted coconut flakes.
2. The Method
Step 1: Toast the Coconut Before you start the custard, put your shredded coconut in a skillet over medium heat. Stir constantly for 3–5 minutes until golden brown. Set half aside for the topping and half for the filling.
Step 2: Mix the Base In a medium saucepan, whisk together the sugar, cornstarch, and a pinch of salt. Slowly whisk in the whole milk and coconut milk. Cook over medium heat, stirring constantly, until it starts to thicken and bubble.
Step 3: The Tempering (Don’t Skip!) Whisk your 4 egg yolks in a small bowl. Slowly pour about half a cup of the hot milk mixture into the yolks while whisking vigorously.
Why? This warms the eggs up gradually so they don’t scramble when you put them in the big pot.
Step 4: The Final Thicken Pour the tempered egg mixture back into the saucepan. Bring to a gentle boil for 2 minutes, whisking constantly. It should look like thick pudding. Remove from heat and stir in the butter, vanilla, coconut extract, and half of your toasted coconut.
Step 5: The Chill Pour the hot filling into your pre-baked crust. Press a piece of plastic wrap directly onto the surface of the custard to prevent a “skin” from forming. Refrigerate for at least 4 to 6 hours (overnight is best).
3. The “Comfort” Finish
Once the pie is completely cold and set:
-
Whip the heavy cream and powdered sugar until stiff peaks form.
-
Pile it high on top of the pie.
-
Sprinkle the remaining toasted coconut generously over the top.
Pro-Tips for Success
-
The “Canned” Rule: Do not use the coconut milk from a carton (the kind you drink). You need the canned stuff; the high fat content is what makes the pie creamy and stable.
-
Extraction: If you can’t find coconut extract, you can omit it, but the pie will taste more like “Vanilla Cream” with coconut bits. The extract provides that “vacation” aroma.
-
Soggy Bottom Prevention: To keep the crust crisp, you can brush the inside of the pre-baked shell with a thin layer of melted white chocolate before pouring in the filling. It creates a moisture barrier!
A Witty Reality Check
Since we’ve been discussing blood sugar and natural remedies today, this pie is essentially the “final boss.” It’s loaded with saturated fats from the coconut and sugar from the filling. It’s absolutely divine, but definitely a “slice-to-share” situation!
Are you a fan of the traditional pastry crust, or do you prefer the extra crunch of a Graham cracker base?